Free Internet for Iran with Microsoft Edge
Creating a SOCKS proxy using SSH on Microsoft Windows 10 and 11


Windows 10 and 11 now come with built in SSH, which is enabled by default or can otherwise be easily installed. This article covers creating a proxy using SSH to open a tunnel to the open internet. Finally we will go over how to configure Microsoft Edge to use that proxy.
Part 0: Reuse existing tunnel
If you've already created a tunnel PuTTY, please go directly to the Part 2 of this article.
Part 1: Creating / Opening the tunnel
Optionally, but very much encouraged is to create a new local account on the computer which will be used to access the internet via the proxy.
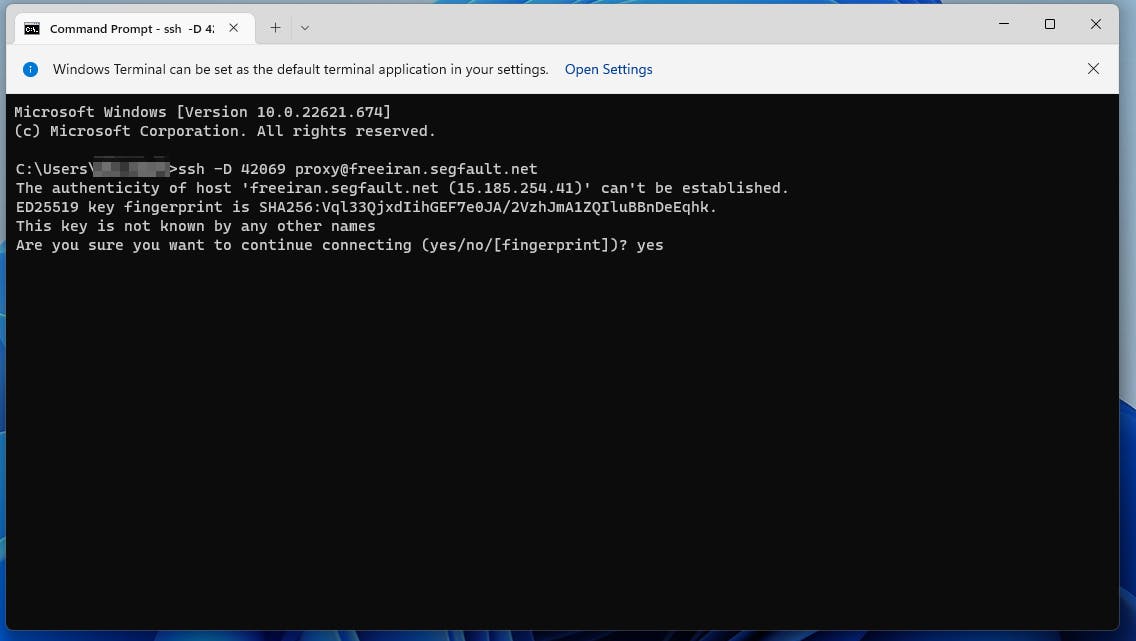
Step 1
Open Terminal which is included in every version of Windows 10 and 11.
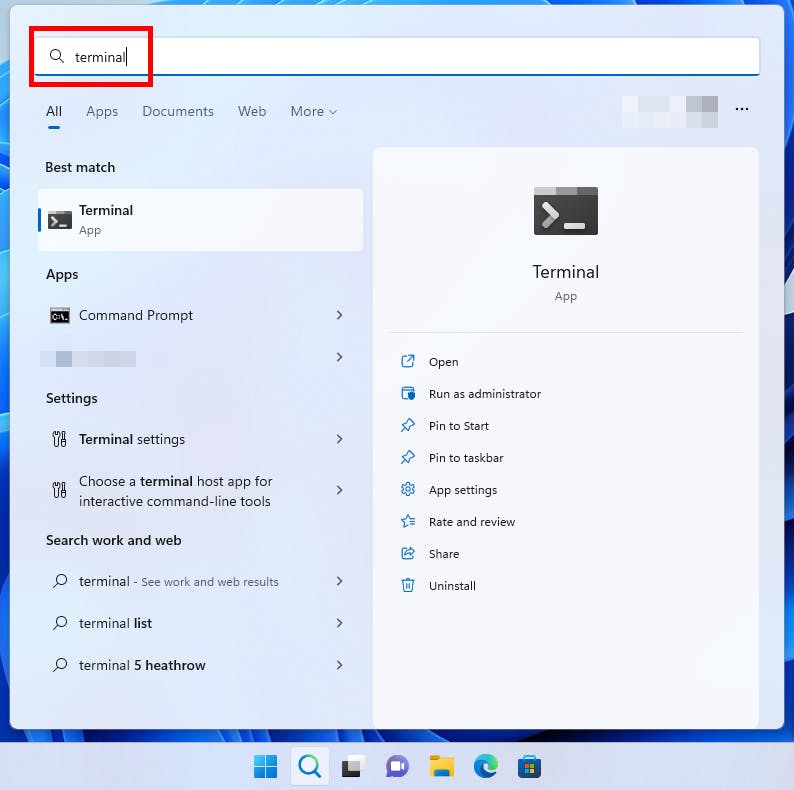
If you can not find Terminal search for Powershell or Command Prompt as Windows has several similar tools.
Step 2
To use Terminal you will type a command and then press enter. This command will connect to freeiran.segfault.net and create a SOCKS proxy for you to use. The command is ssh -D 42069 proxy@freeiran.segfault.net.
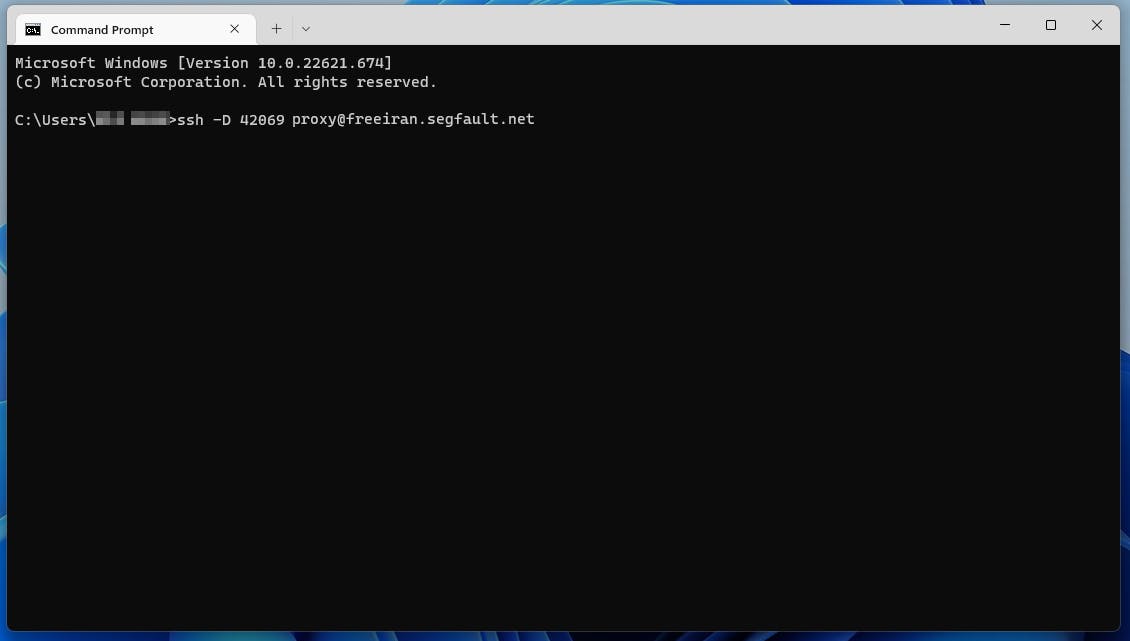
After you have typed the command out (take care it is case sensitive), press Enter on your keyboard.
Step 2b
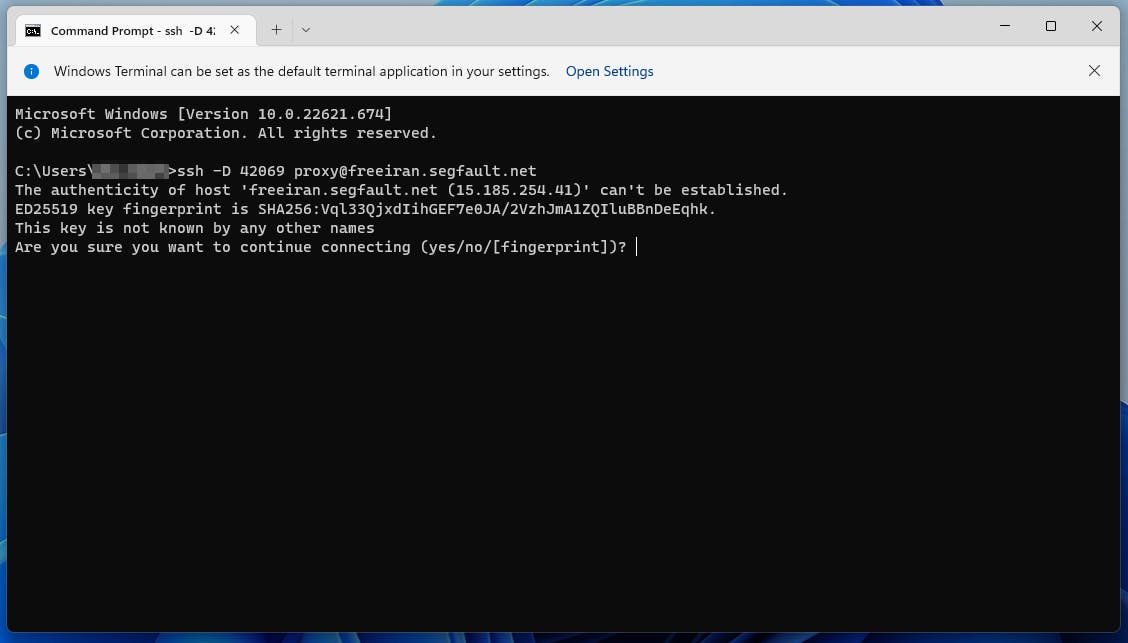
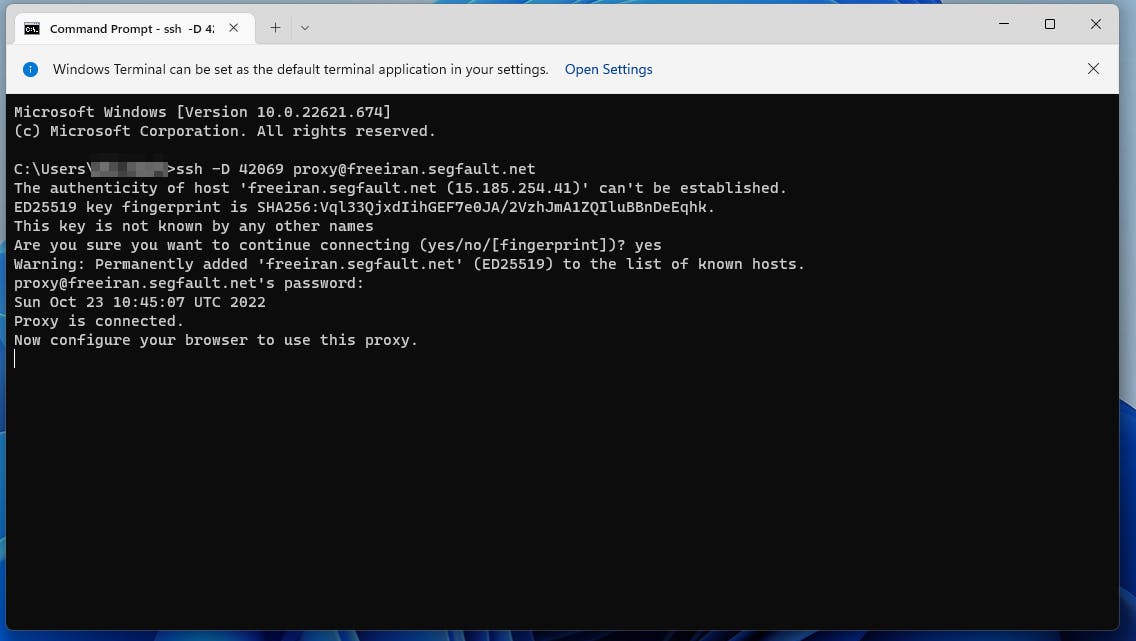
If this is the first time you are connecting to freeiran.segfault.net you will likely be asked to confirm the fingerprint. If this happens type yes and press Enter.
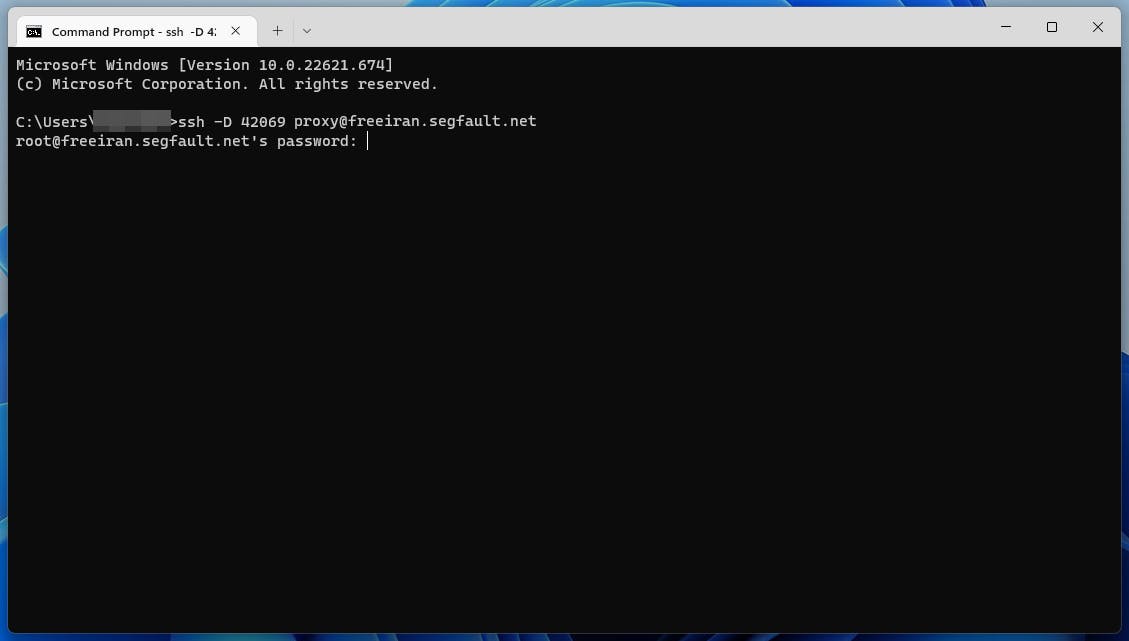
Step 3
Now you will be asked to enter the password. For freeiran.segfault.net this password is proxy. Type proxy and then press Enter. Be careful as it is case senstive. You will not be able to see anything changing as you type until you have pressed Enter.
Step 4
You are now connected to the server, you have now successfully created a SOCKS proxy and a tunnel to the open internet.
Part 2: Making Microsoft Edge use the tunnel
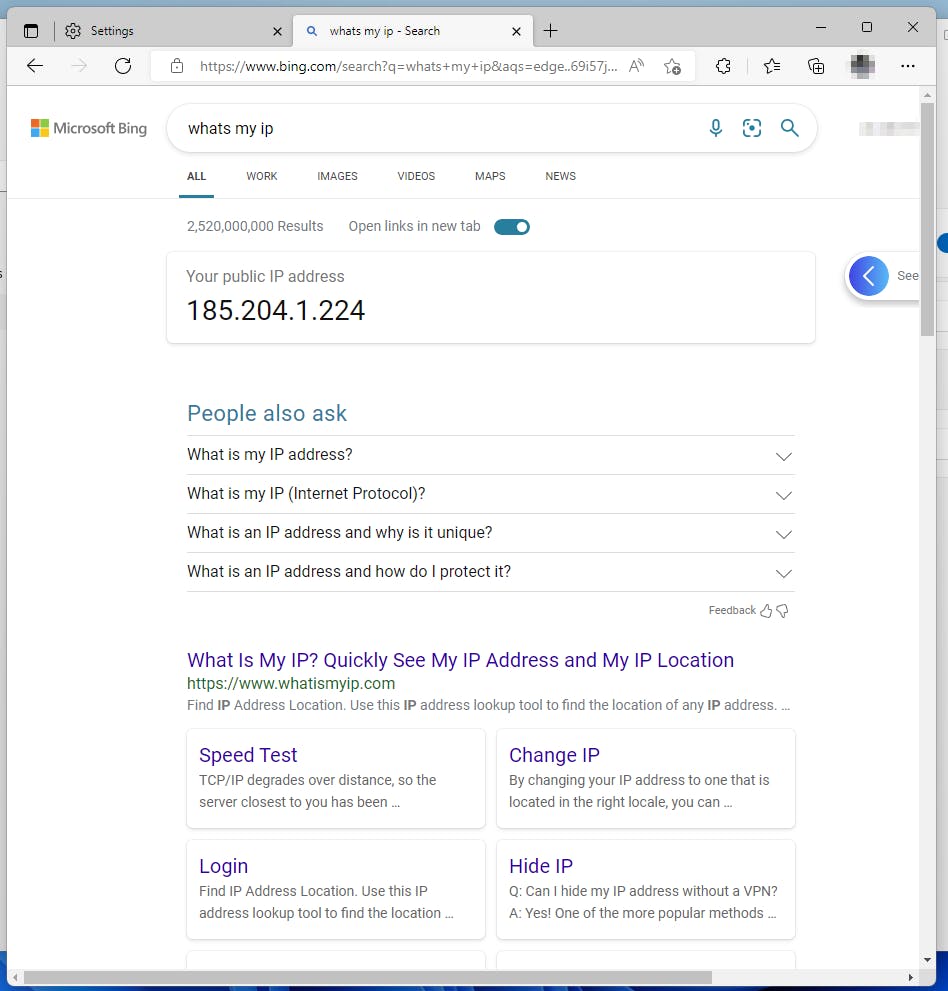
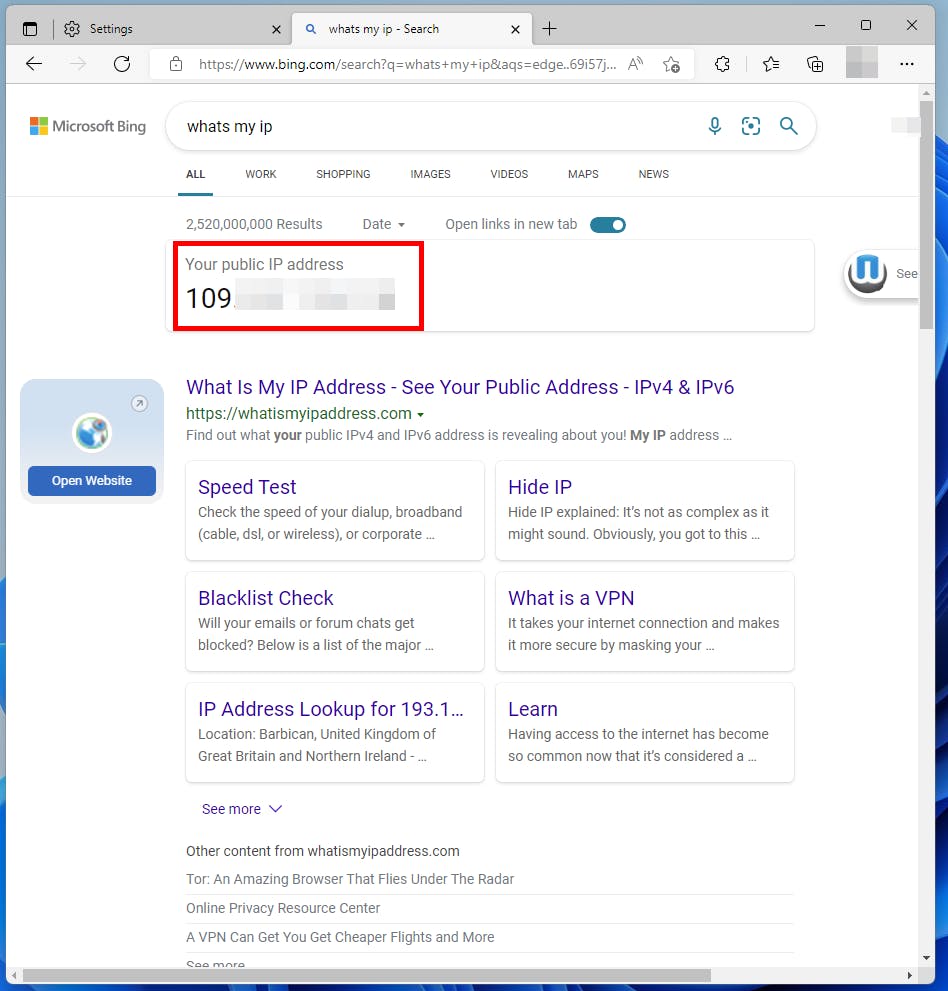
Step 1
Open Edge and check your IP address.
Step 2
Open the Settings page on Edge
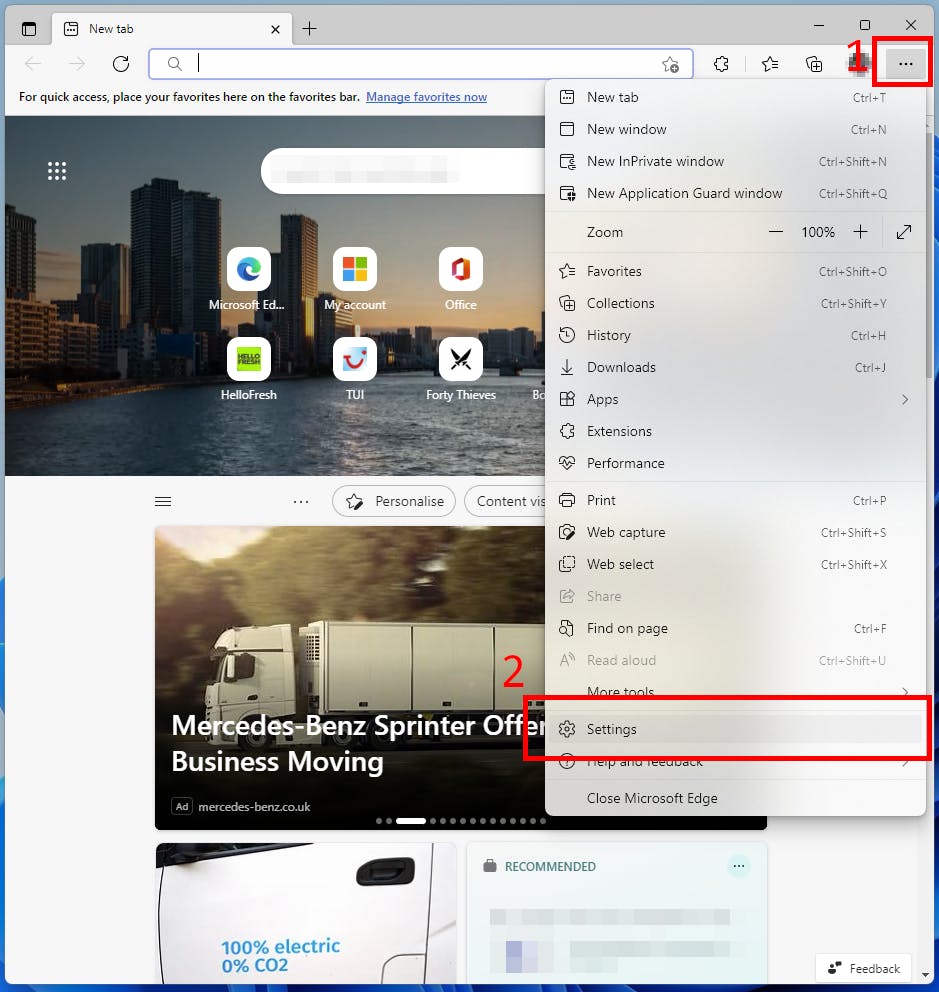
Step 3
This will show you the general profile settings page, click the top left corner to look at more settings
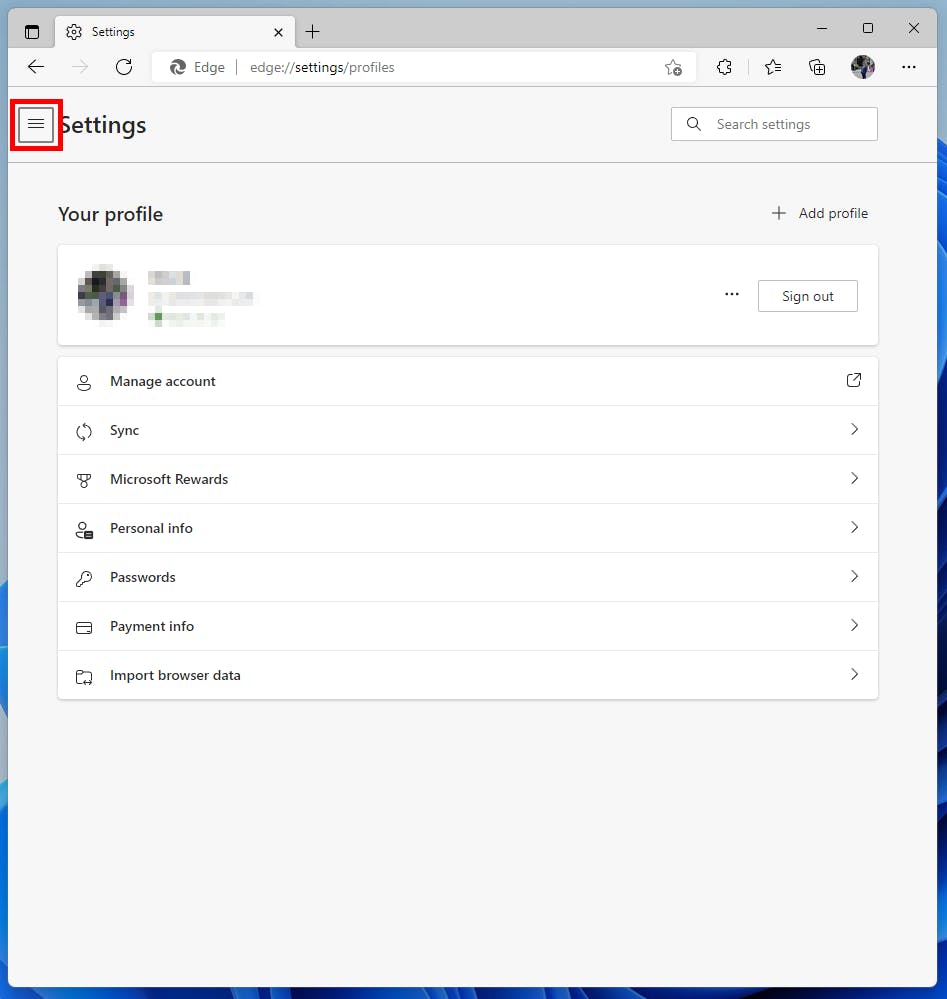
Step 4
Now open the System and performance section by clicking it
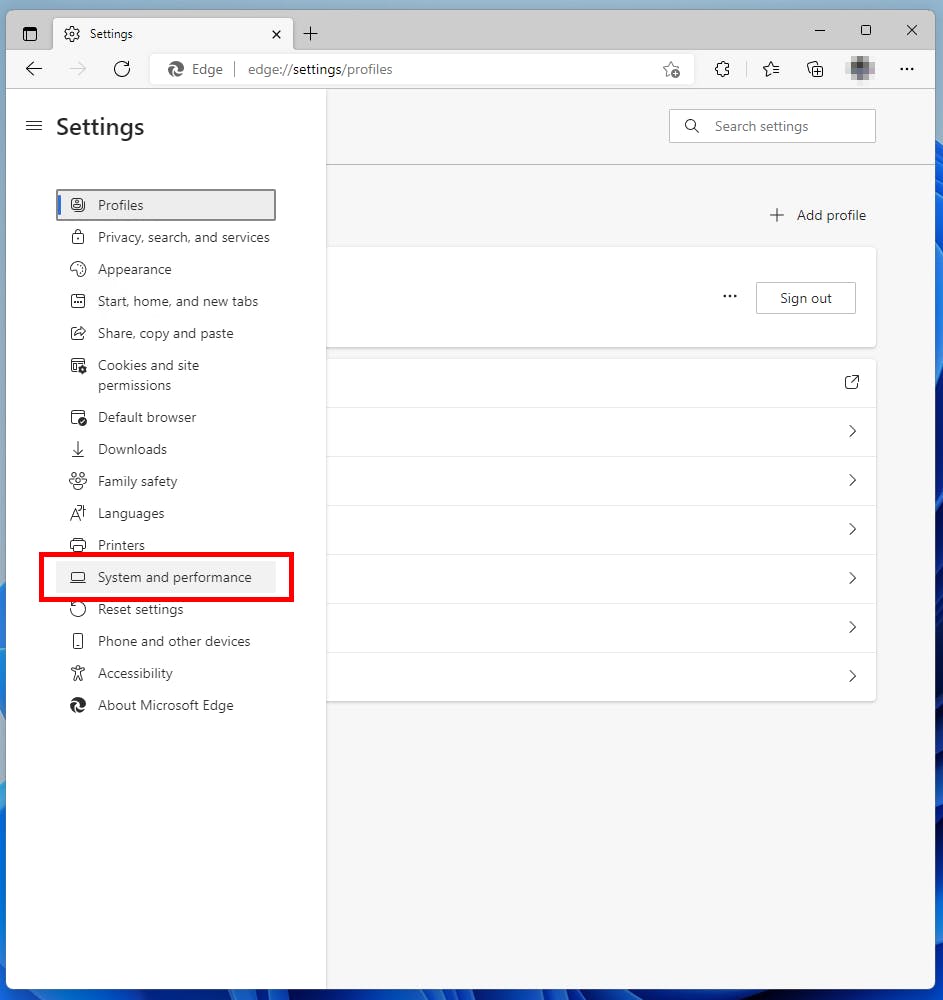
Step 5
Now click the open your computer's proxy settings button.
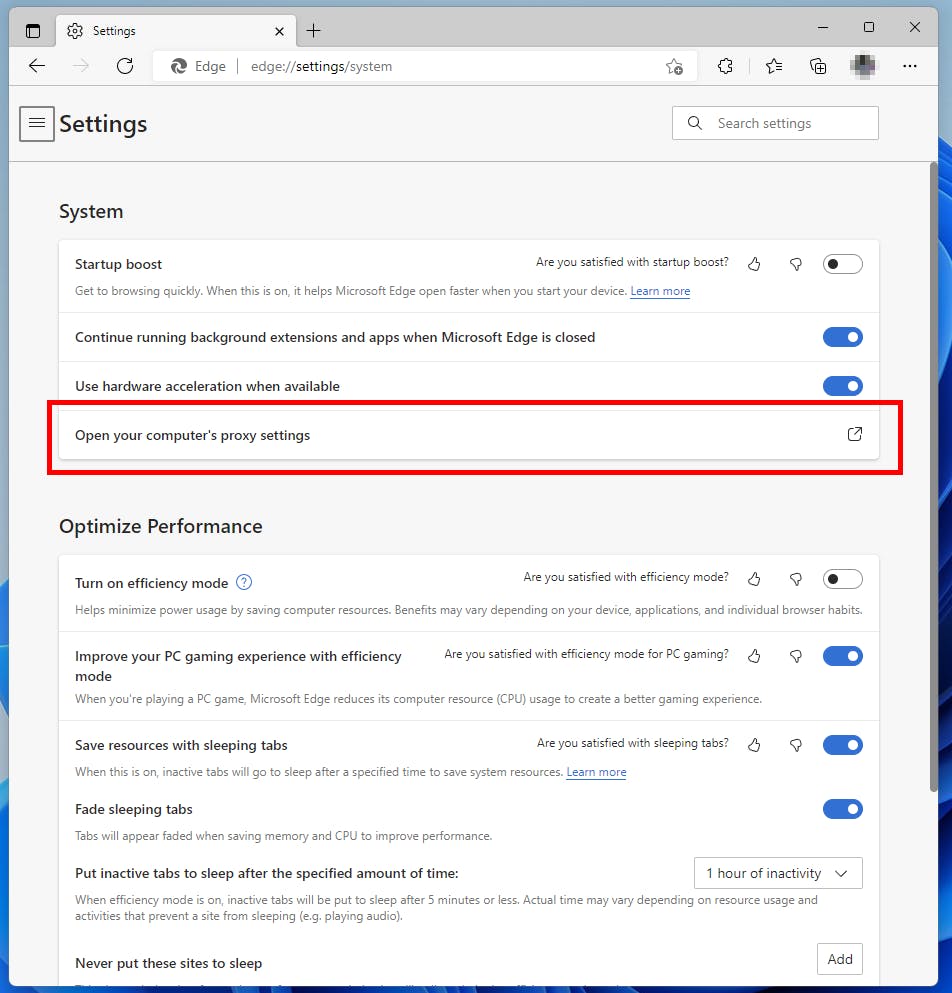
Step 6
We'll configure a manual proxy, click Use a proxy server to open the settings.
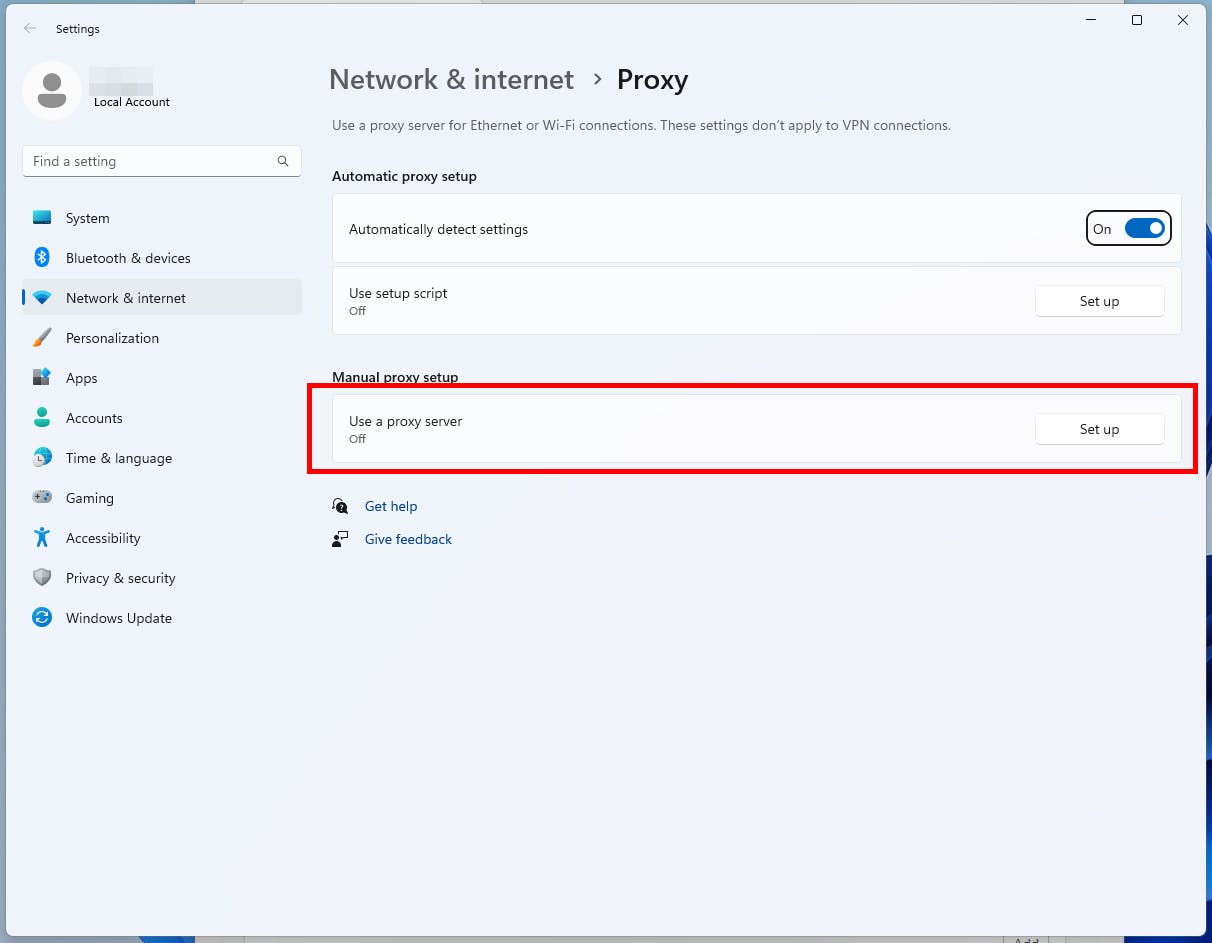
Step 7
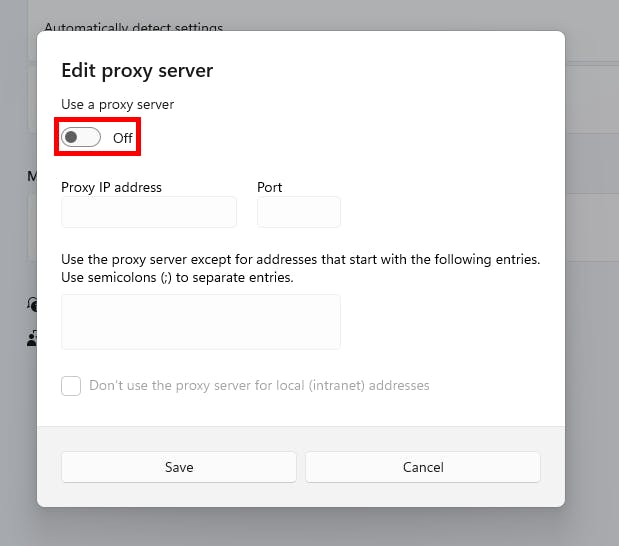
You will need to turn on the toggle to allow you to edit the settings.
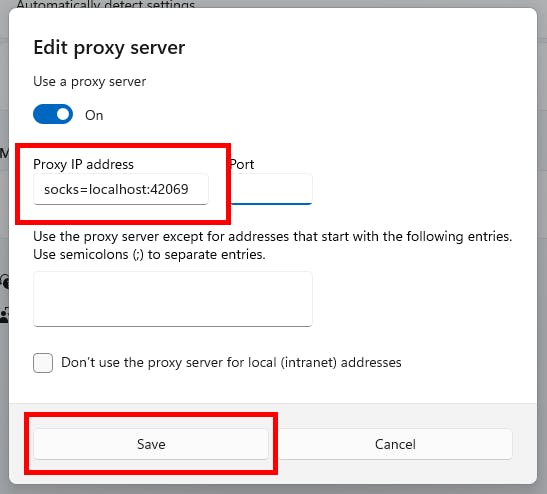
Step 8
Set the proxy address to socks=localhost:42069 and save the settings.
Or socks=localhost:2280 if you've used PuTTY for creating the tunnel.
Step 9
Check it all worked and your IP has changed in Edge